My latest Tech Discoveries and Why I Recommend Them
After realizing that I've gravitated towards a lot of different tech lately, I thought I would share my experiences.

Posted on Jul 24, 2025 | 17 minutes to read
I don’t always try a lot of new tech, but when I do, I like to talk about it
We all have our ‘go-to’ apps, frameworks, operating systems, etc. Software folks come from many different backgrounds and have a lot of different ideas about most things, but one thing we all have in common is that we’re heavily opinionated when it comes to technology. In the past year or so, I’ve noticed that I’ve been switching up some of my old choices and want to share my experiences with them. I’m not saying these recommendations will be best for everyone, but in my opinion they’re working well for me and deserve consideration. I’m also a huge fan of FOSS, and most of what you’ll find in this post is free and open source!
Fedora KDE
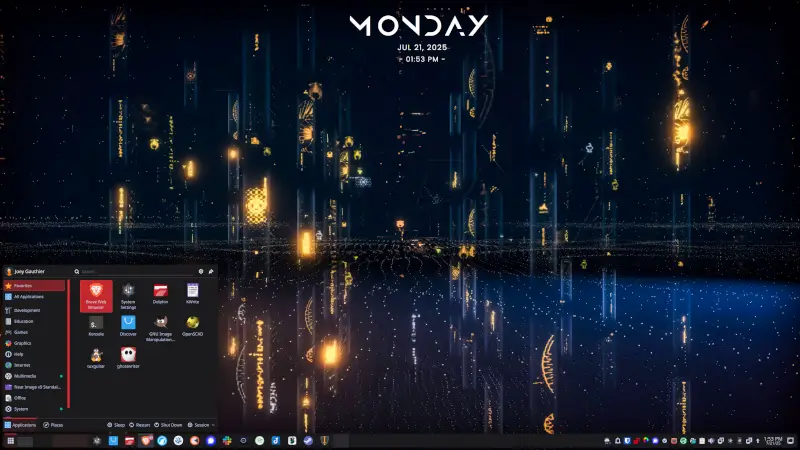
While I worked in IT, I became a fan of Linux in general. It was almost as if seeing the worst parts of Windows day after day finally pushed me toward trying something new. I’ve always been what you might call an Apple hater - not because I dislike all things Apple, but rather because they generally sell overpriced hardware and trap users in their walled garden. Having complete control over my devices is extremely important to me, and since I’ve never cared about status symbols, Apple devices hold zero appeal. There’s also the value factor: with Linux being free, it’s hard to beat.
In my early years of using Linux, I tried a few distributions but always returned to Ubuntu. The familiarity with GNOME as my desktop environment and apt as my package manager made Ubuntu feel comfortable. As a Linux user, your choice of desktop environment greatly influences your app ecosystem, and GNOME offers both ease of use and excellent applications. Learning CLI commands for package managers was more necessary back in 2008 when I started with Linux. Once I mastered updating packages, fixing update errors, and removing packages through apt in the command line, I saw little need to learn another package manager. Eventually, Canonical introduced Unity, which I hated, and began including Amazon results in search, which felt against Linux’s spirit. I realized Ubuntu was becoming more commercialized, so I started exploring other distributions.
The vast array of choices in Linux is both liberating and overwhelming - a double-edged sword. You can choose from countless distributions, package managers, and desktop environments. This freedom can sometimes lead to decision paralysis. At that time, I tried major distributions like Fedora, Arch, Debian, OpenSUSE, and their many derivatives. I even experimented with lesser-known distros to understand what made them unique.
Over the next few years, I found a few distributions I used for extended periods, but always felt something better might exist. One day, while watching a Linux YouTuber praise how much KDE Plasma had improved over the years, I decided it was time to give KDE another try. I also wanted a distribution that balanced cutting-edge updates with stability - more current than Ubuntu derivatives but more reliable than Arch-based systems (I’d experienced system-breaking updates twice during my year on Arch). When I discovered Fedora offered a KDE version as a community build, I decided to try it.
Modern KDE Plasma is excellent. The interface will feel familiar to Windows users, but with far superior customization options and visuals. The app ecosystem is extensive with many high-quality choices. While Flatpaks and AppImages now solve much of the packaging dependency issues, I still prefer native packages that integrate with my desktop environment. I also use my PC for gaming, and Steam, Heroic Launcher, Proton-Up QT, and Gamemode have all installed perfectly in KDE (at least for me).
Fedora has improved significantly since I first tried it years ago. Its package manager, dnf, and package format, rpm, are easy to learn and use. The balance of getting software updates faster than Ubuntu while maintaining more stability than Arch is perfect for me. I haven’t experienced any system-breaking bugs with Fedora. I’ve also never waited more than a week for essential software updates (like when I needed newer Mesa drivers for the game Doom: The Dark Ages, which I bought at launch). Another feature I appreciate is Fedora’s option to install system updates only on reboot, reducing the risk of update-related issues.
Fedora with KDE has been my choice for about a year and a half across all my devices - gaming PC, both laptops, and even my wife’s computer. In that time, Fedora KDE has become an official flavor, meaning it will receive even better support from the main Fedora team.
If you’re interested in trying Linux, I highly recommend Fedora KDE right now!
Cursor
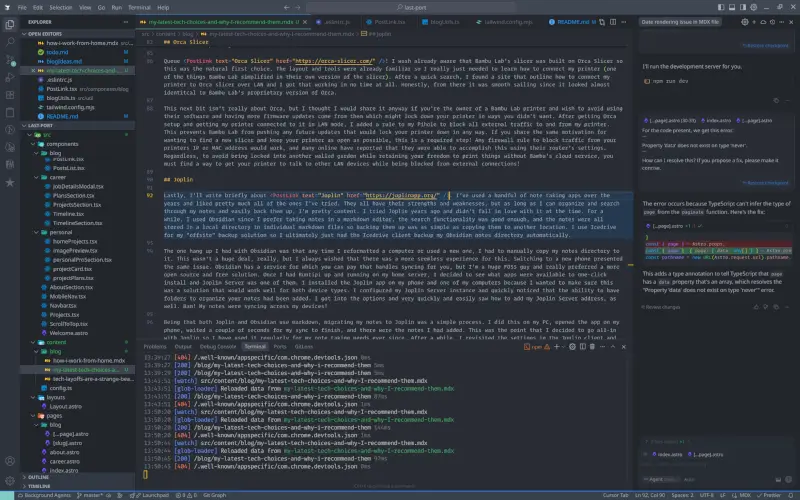
I’ve resisted using AI in my coding workflows until very recently. While I believe AI is currently overhyped, I also see its potential to disrupt the software industry as we know it. Every time we use AI, we’re training what might become our replacement. I don’t know about you, but I like what I do for a living and would like to continue doing it for another couple of decades until retirement!
One day at work during an engineering meeting, my manager presented about using LM Studio with VS Code’s Continue extension for local LLM-based code completion - something that interested me because there were no subscription fees and the models didn’t learn from our usage. Indeed, like many other tech companies, was pushing hard for engineers to use AI code generation or completion tools to maximize productivity. I went ahead and got everything installed and configured to try this new approach.
My first impressions were underwhelming to say the least. While I used some of the suggested autocompletions, most were what I’d charitably call “hot garbage” and the code generation was even worse. After trying several different models, I still found little value in using them. As LM Studio loaded models locally, I also noticed significant resource usage - my work laptop frequently slowed down and sounded like a jumbo jet taking off during use. After a couple months of experimentation, I finally uninstalled everything and returned to being the self-sufficient developer who didn’t rely on AI assistance.
Then came a breakthrough when our lead engineer presented about using Cursor to generate unit tests at Indeed. With pressure mounting from management to adopt AI tools, I reached out after his presentation and asked how to get set up since our company was paying for Cursor access. He shared the setup instructions via Confluence, and I quickly got started.
The first thing I asked Cursor to do was write unit tests for my current ticket. Within seconds, I had a new test file with coverage exceeding our 85% requirement - an impressive result! After using Cursor for a couple of months at work, I decided to purchase a personal subscription as well. My reasoning is that AI coding assistance will likely become the industry standard, so it makes sense to get comfortable with these tools.
While I’ll admit the code generation is often just slop, Cursor’s ability to generate decent unit tests has proven to be its most valuable feature for me. The code completion functionality is also pretty good most of the time, saving a few seconds here and there that add up over the day. My perspective on AI coding assistants has evolved somewhat - while they’re still far from replacing senior engineers, they do have value in specific areas like unit test generation or making small edits across multiple files. Even advanced models like Claude and Gemini produce hallucinogenic slop when working with larger, complex codebases. However, they can be helpful for simpler tasks. For now, I continue to find value in using Cursor and maintain my subscription.
Astro
Most developers who use React have likely experimented with Next.js and/or Gatsby. For several years, these were essentially the only options when building static sites with React. While I’ve tried both and honestly never been particularly enthusiastic about either, I recognize their value.
I’ve also worked with Eleventy for documentation generation and briefly explored Nuxt during my time using Vue to build a portfolio website. For a short period, I experimented with Fresh which uses Deno instead of Node — I’d recommend giving that stack a try if you haven’t yet. There are many options in this space today, each with distinct strengths and weaknesses to consider when choosing tools for a project.
When considering static site generators for refreshing this website, I wanted something new yet familiar. While I knew Tailwind CSS would likely be part of the solution, I sought a generator that offered excellent developer experience along with built-in functionality. As personal projects often serve as testing grounds for new technologies, I quickly ruled out Next.js and Gatsby since I’d used them before. That’s when I discovered Astro.
Browsing Astro’s documentation immediately appealed to me—it uses the islands architecture like Fresh does (which I found compelling) and offers multiple templating options including React support. The healthy plugin ecosystem was another major plus, as developers typically want easy PWA, sitemap, and RSS feed setup rather than manual configuration. Astro checked all these boxes.
Getting started with Astro proved straightforward. Its excellent documentation combined with Vite-based tooling makes for a fast, simple development experience. The configuration is intuitive and plugins are easy to implement. I built this site quickly and am very pleased with the results. This blog section was set up in about 30 minutes this past weekend. Even complex tasks like dynamic routing for pagination were surprisingly simple. My greatest challenge (as always) was styling — I appreciate good design but don’t consider myself a designer.
Astro’s versatility became even more apparent when I used it again for another project requiring partial hydration capabilities. If you haven’t tried Astro yet, I highly recommend giving it a chance!
Runtipi
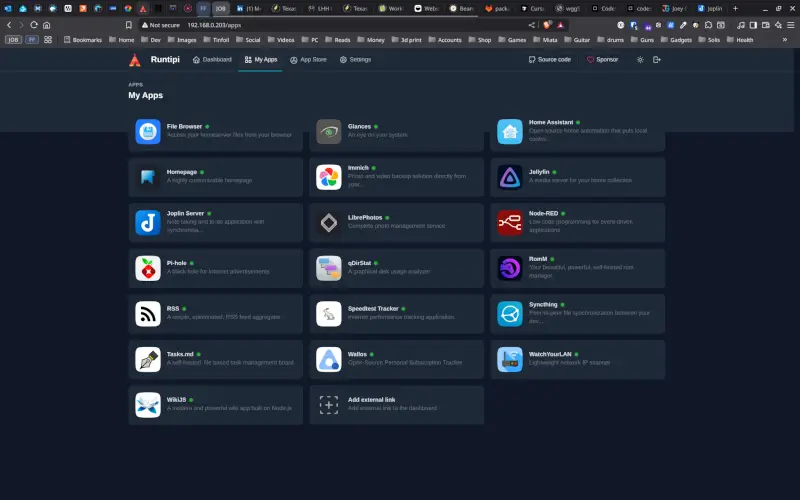
The Runtipi project is essentially a tool that simplifies deploying and managing multiple server applications using Docker. It provides a nice GUI for one-click installations, updates, and serves as a dashboard to manage your server.
I had accumulated extra PC parts over the years from building computers for myself, my family, and friends. I wanted to build a home server with self-hosted applications to avoid privacy concerns and costs associated with big tech solutions. I decided to assemble these parts into what I’d call my home server, installed Ubuntu Server on it, and gave Runtipi a try.
Previously, I had used Docker Compose for running a few applications on my home server. While that solution works well, Runtipi appealed to me because I wouldn’t need to maintain complex YAML configuration files or write numerous cron jobs just to keep everything updated. Following the excellent documentation, I had Runtipi up and running in just a few minutes. From there, I began installing applications through the GUI interface. Within an hour or so, I had a nice selection of apps installed and running—I was very impressed with how smooth the process was overall.
Admittedly, it wasn’t all perfect right out of the gate. I noticed my Pi-hole installation wasn’t receiving any network traffic. After checking the documentation and searching for solutions briefly, I discovered what needed to be done to properly configure my Ubuntu Server installation for this to work. A few adjustments in Pi-hole’s interface got everything working as expected!
There were also a couple of applications for which I wanted custom configurations. After modifying their individual docker-compose.yml files without seeing the desired results (or any at all), I turned back to Runtipi’s documentation. Within minutes, I learned that custom configuration rules needed to go into a user-config/<app-name> directory with its own YAML file. This approach is nice because it only requires you to add your changes rather than rewriting the entire original configuration file completely. Plus, backing up your custom configurations becomes much simpler since you just need to copy the user-config directory.
If you’re looking to set up a home server and install several self-hosted applications, I would highly recommend giving Runtipi a try. It’s an excellent solution for getting started and has proven to be very stable and reliable in managing my server applications.
LM Studio
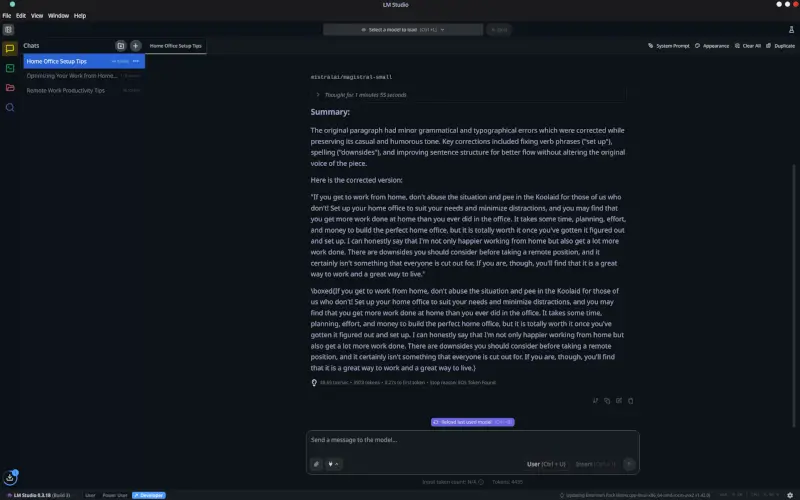
I’ve mentioned LM Studio before in relation to Cursor, though I don’t find it ideal for code generation or completion—it still offers some value.
The system running LM Studio should be reasonably powerful to handle larger models and return outputs quickly. As I use my gaming PC as my primary computer, I have 64GB RAM, a Ryzen 7 5800X3D, and a Radeon 7900 XTX at my fingertips. I can load substantial models and get results promptly. Your experience may vary based on your hardware.
Currently, I primarily use LM Studio as an editor and proofreader. While tools like Grammarly catch basic mistakes and suggest minor rewrites, using a well-chosen model in LM Studio provides significantly better results. For example, when writing this blog, I often prompt it with:
"This is a section from a blog post I'm writing. Please correct any spelling and grammar errors and make small improvements to the writing style while preserving my original tone and voice."
The results aren’t perfect, but editing takes just a few minutes and yields much-improved text for my site.
I’ve also used LM Studio to refine my resume — uploading it and requesting improvements yielded helpful output. My LinkedIn profile received similar treatment last week, with satisfactory results. Since my writing style tends toward casual and playful at times, I specifically asked for more professional phrasing, which matched what I was looking for.
The amount of models available is quite large, and many of them are very specialized for specific tasks. I played around with an electrical engineer model while I was modifying a circuit in one of my guitar effects pedals and I found it useful for identifying the values of some of the components I was removing and adding. I gave a writing model a prompt to provide me a plot for a post-apocalyptic 2D side-scrolling game I had the idea to create, and not only did I find the plotline to be great, I even fell in love with the character names it provided. There are a lot of things you could potentially use LM Studio for, and I would say that is is definitely worth checking out!
Orca Slicer
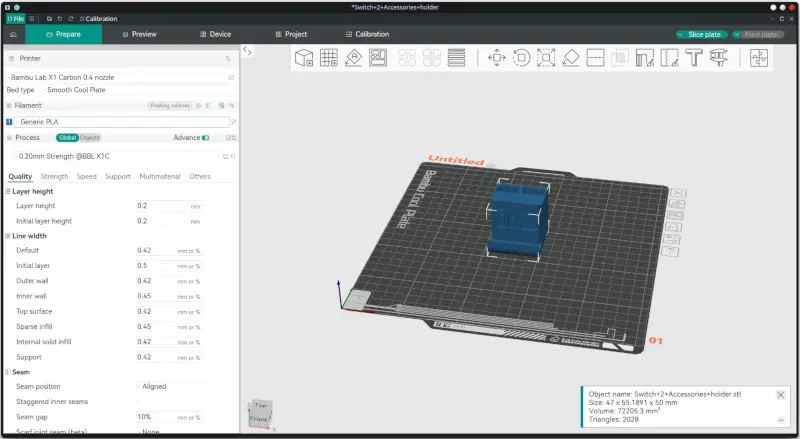
I’m very enthusiastic about 3D printing, but if I had to pick an even greater passion, it would be consumer rights and privacy.
A few years ago, I purchased a Bambu Lab X1 Carbon 3D printer and I absolutely loved it! After a couple of years of using it, news began circulating online about potential censorship of printable models and possible future requirements to use only their filament and parts. This was deeply troubling! When I buy something, it becomes mine to modify and source parts for as I see fit, not the manufacturer’s decision. Bambu Lab seemed intent on becoming “the Apple of 3D printing,” and that was the last thing I wanted. It was time to find a new slicer solution so I could stop using Bambu Lab’s proprietary software entirely.
Enter Orca Slicer! I already knew that Bambu Lab’s slicer had been built on Orca Slicer, making it the natural first alternative to try. The layout and tools were familiar, so my main challenge was learning how to connect my printer (which Bambu Lab had simplified in their proprietary version). After a quick search, I found instructions for connecting my printer to Orca Slicer over LAN and had it working in no time. Honestly, from there the experience felt almost identical to using Bambu’s version of Orca.
The next part isn’t strictly about Orca Slicer, but I’ll share it anyway if you own a Bambu Lab printer and want to avoid their software while preventing future firmware updates that might lock down your printer. After setting up Orca and connecting my printer via LAN, I added a rule to block all external traffic to/from my printer through Pi-hole. This prevents Bambu Lab from pushing unwanted updates that could limit your printer’s functionality. If you share my motivation for avoiding walled gardens and want maximum freedom over what you print (without involving Bambu’s cloud service), this is an essential step! Any firewall rule that blocks traffic from your printer’s IP or MAC address will work—many users have successfully implemented this through their router settings alone. For complete freedom to print without being locked into another walled garden, find a way to allow only local network communication with your printer while blocking all external connections. This maintains your ability to use your printer fully without corporate oversight!
Joplin
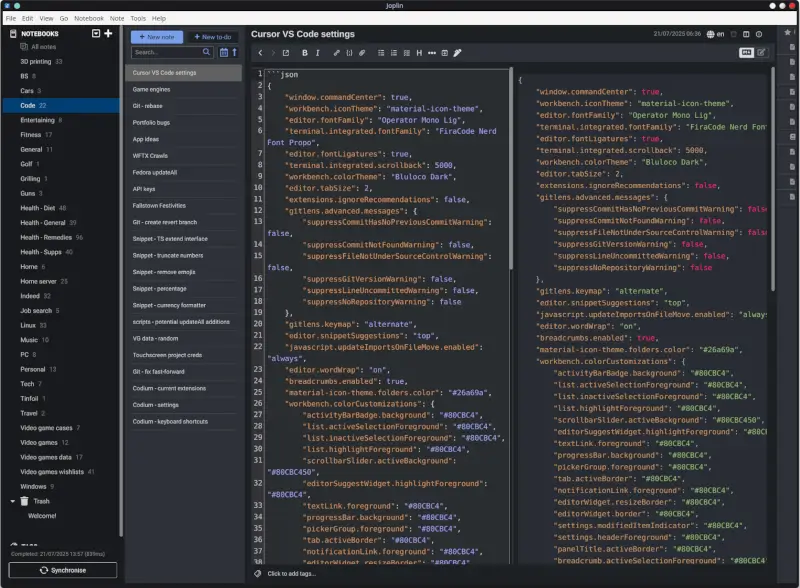
Finally, I’d like to briefly mention Joplin. Over the years, I’ve tried several note-taking apps and generally liked them all. As long as an app lets me organize my notes effectively, search through them easily, and allows for simple backups, I’m usually content.
I first tried Joplin years ago but wasn’t immediately won over. For a while, I used Obsidian instead since I prefer Markdown-based editors with good search functionality and local file storage (which made backing up as easy as copying files). I even set up the Icedrive client to automatically back up my Obsidian notes directory.
My main frustration with Obsidian was having to manually transfer my notes whenever I got a new computer or phone. While not a huge burden, it wasn’t ideal either. Obsidian does offer a paid syncing service, but as a strong supporter of FOSS (Free and Open Source Software), I preferred an open solution.
Once I had Runtipi running on my home server, I decided to explore available one-click install apps and Joplin Server was among them. I installed Joplin on my phone and computer to test if it would work well across different device types. After configuring my Joplin Server instance, I discovered that note organization with folders had been added since my last try. Setting up the Joplin client was straightforward: I simply entered my server address in the settings, and—just like that—my notes synced across all my devices! Since both Joplin and Obsidian use Markdown, migrating my existing notes was simple. After copying them to Joplin on my PC, waiting a few moments for syncing to complete on my phone, I saw all my notes were there. This positive experience convinced me to adopt Joplin full-time. Later, I discovered the plugin system that made Joplin even more useful. Within minutes, I installed several plugins that added features like favorites for quick access to frequently referenced notes, table formatting tools, and additional Markdown settings.
I’ve found Joplin Server to be extremely stable and reliable for both syncing and backing up my notes. A particularly nice feature is that each device maintains a complete local copy of all notes, which means if one device fails, I still have access to everything on other devices—so nothing gets lost. The only minor downside to this setup is that since I keep my server internally accessible for security reasons, I need to open Joplin on any device before traveling to ensure I have the latest notes. On a recent trip to Tennessee, I remembered to do this on both my phone and laptop before leaving. All notes created while away were stored locally and automatically synced back to my server once I returned home.
Overall, I’m very satisfied with Joplin and glad I gave it another chance!
We should all try new things from time to time!
I’m glad I tried all the tools and technologies mentioned in this post. If I hadn’t been open to trying them, my workflows wouldn’t be as simple or convenient today. When I eventually find a reason to explore alternatives, I’ll certainly remain open-minded about new possibilities. For now, I plan to keep using these tools for quite some time!