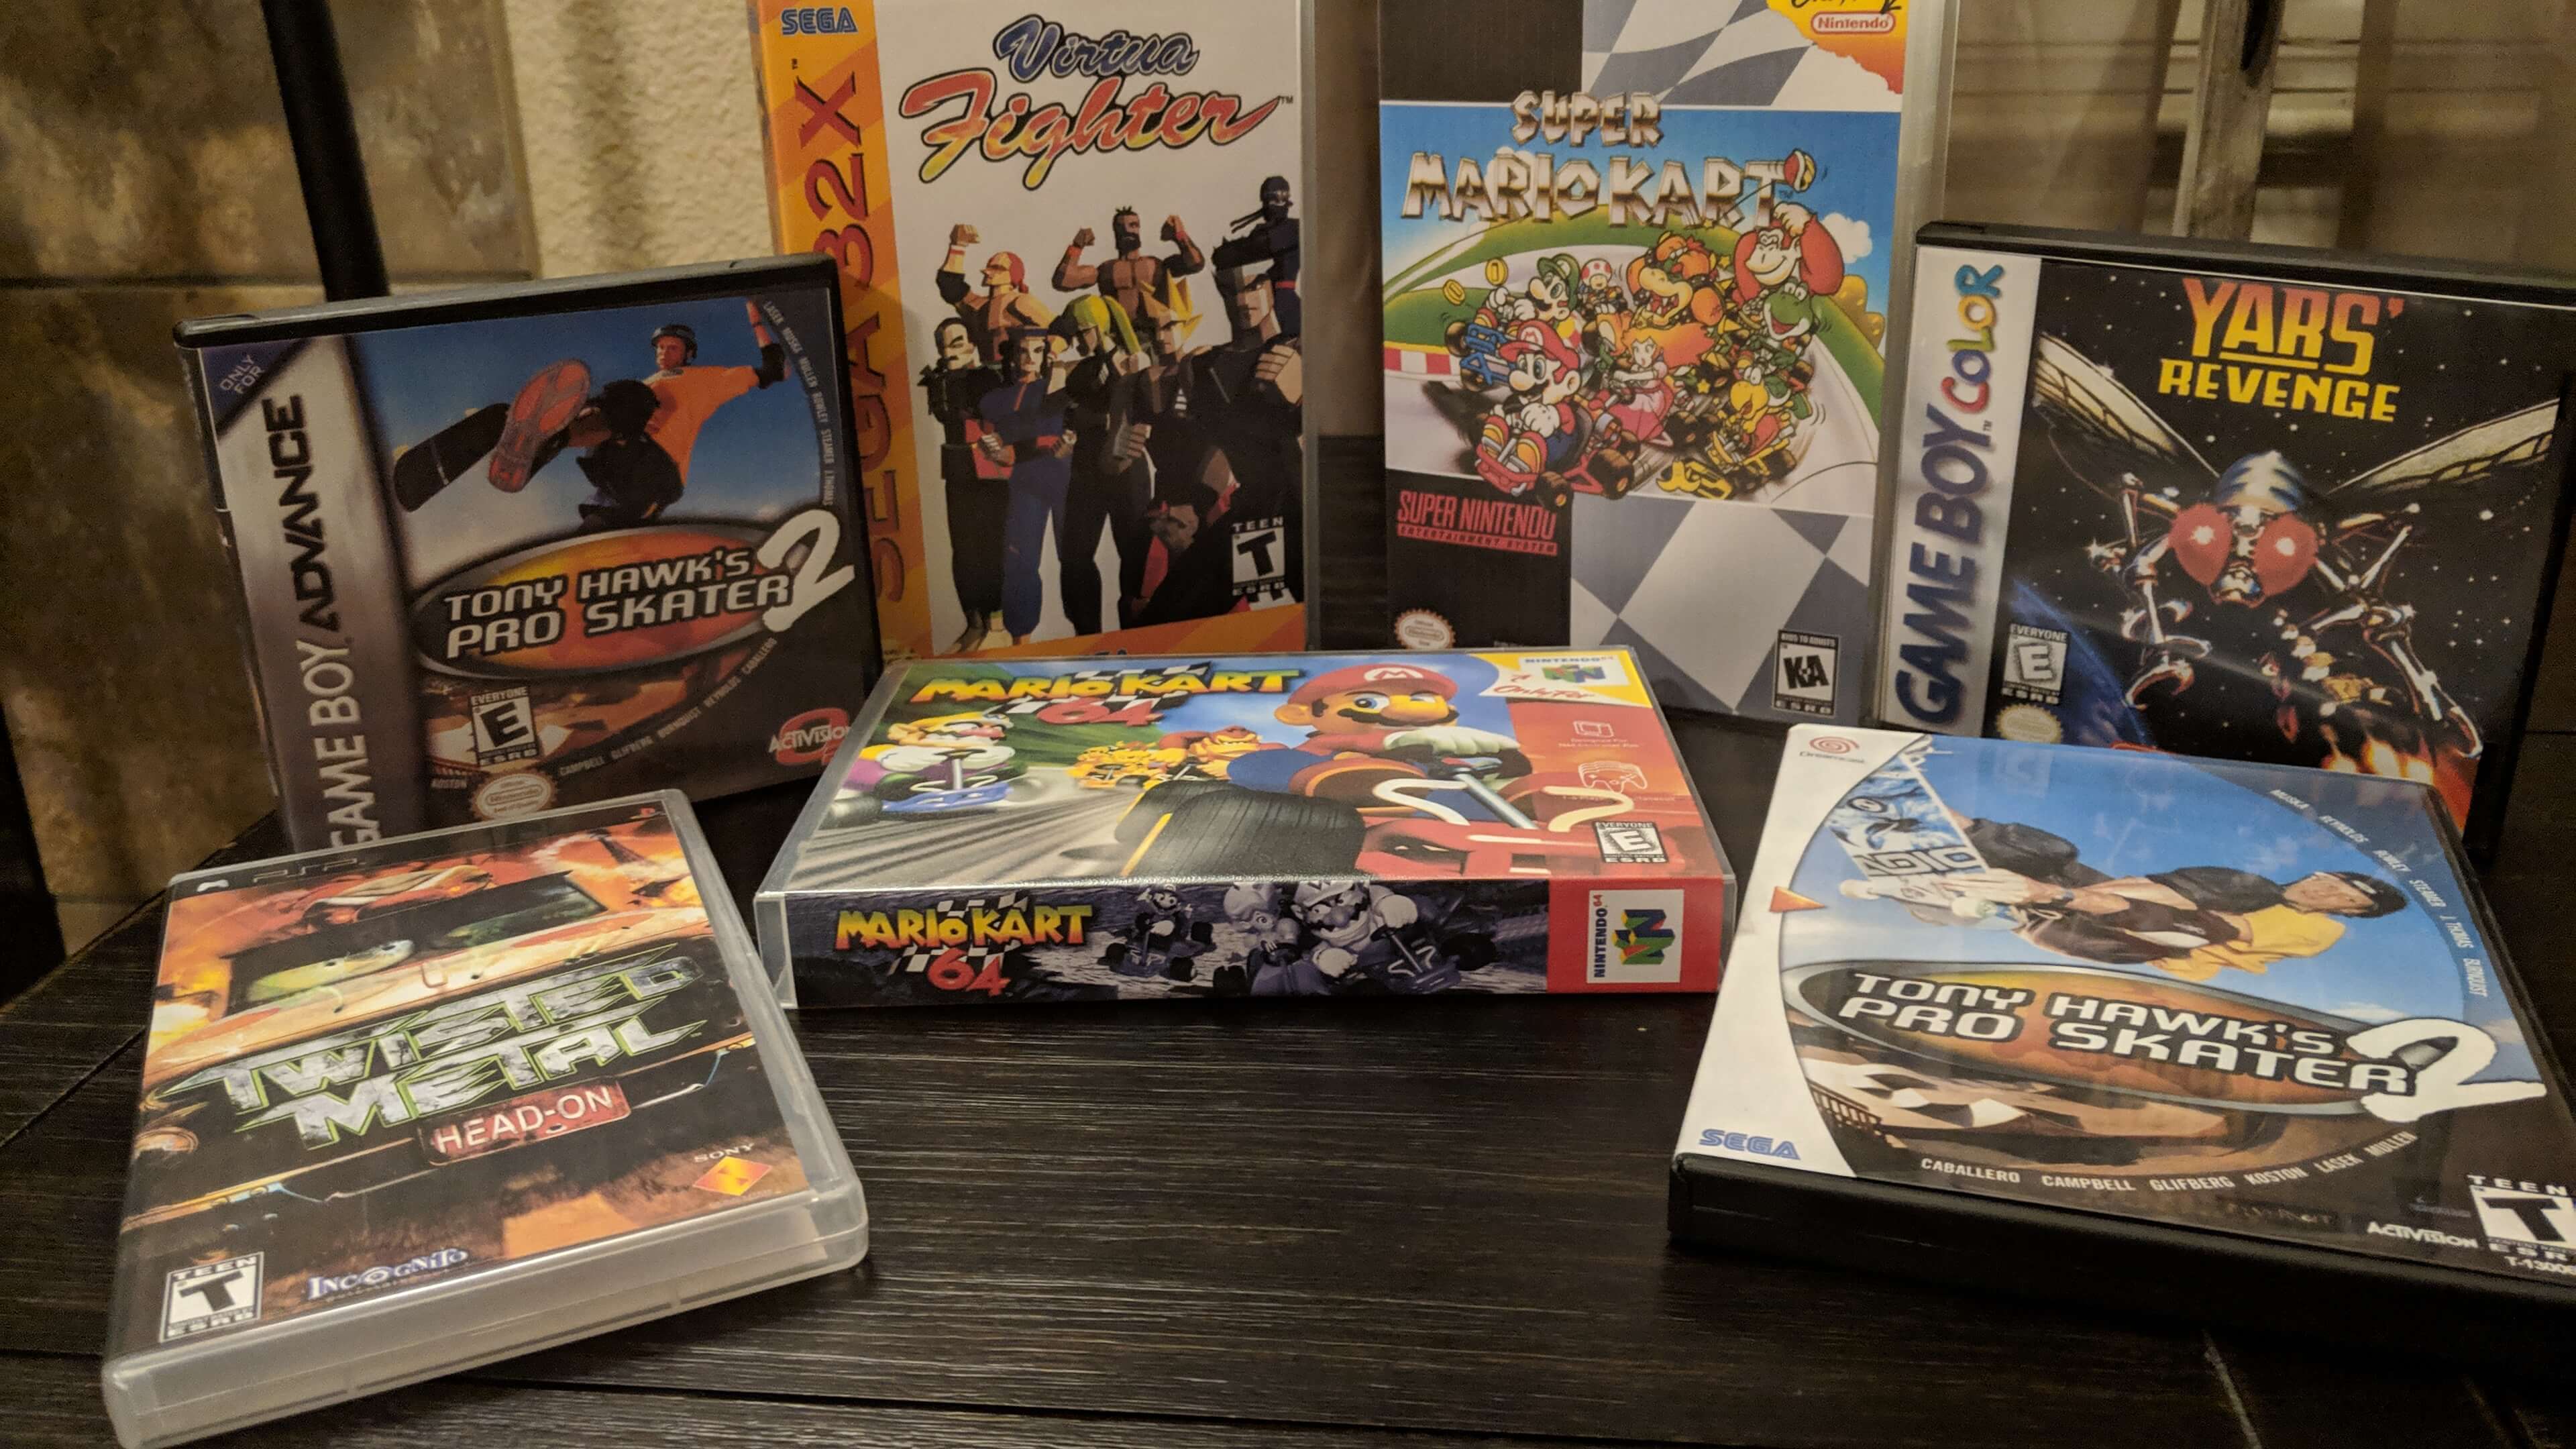
The biggest thing about retro game collecting I don’t care for much is that most older cartridge games don’t come with cases. On the rare occasion I find an old game with the original box, I store the box on a shelf separately because I don’t want it to suffer any additional wear and tear. I’ve found a few ways to safely store my retro games that not only adds additional protection to the games while in storage but also makes my collection look nicer.

Universal Game Cases to the Rescue!
Thankfully, there exists a wonderful thing referred to as a universal game case. These cases will store your N64, Genesis, 32X, Super NES, and more. They have an array of plastic bits inside the case that allow you to fit cartridges from different consoles in varying configurations. Most games will just fit in as expected except for SNES games which fit once turned sideways.

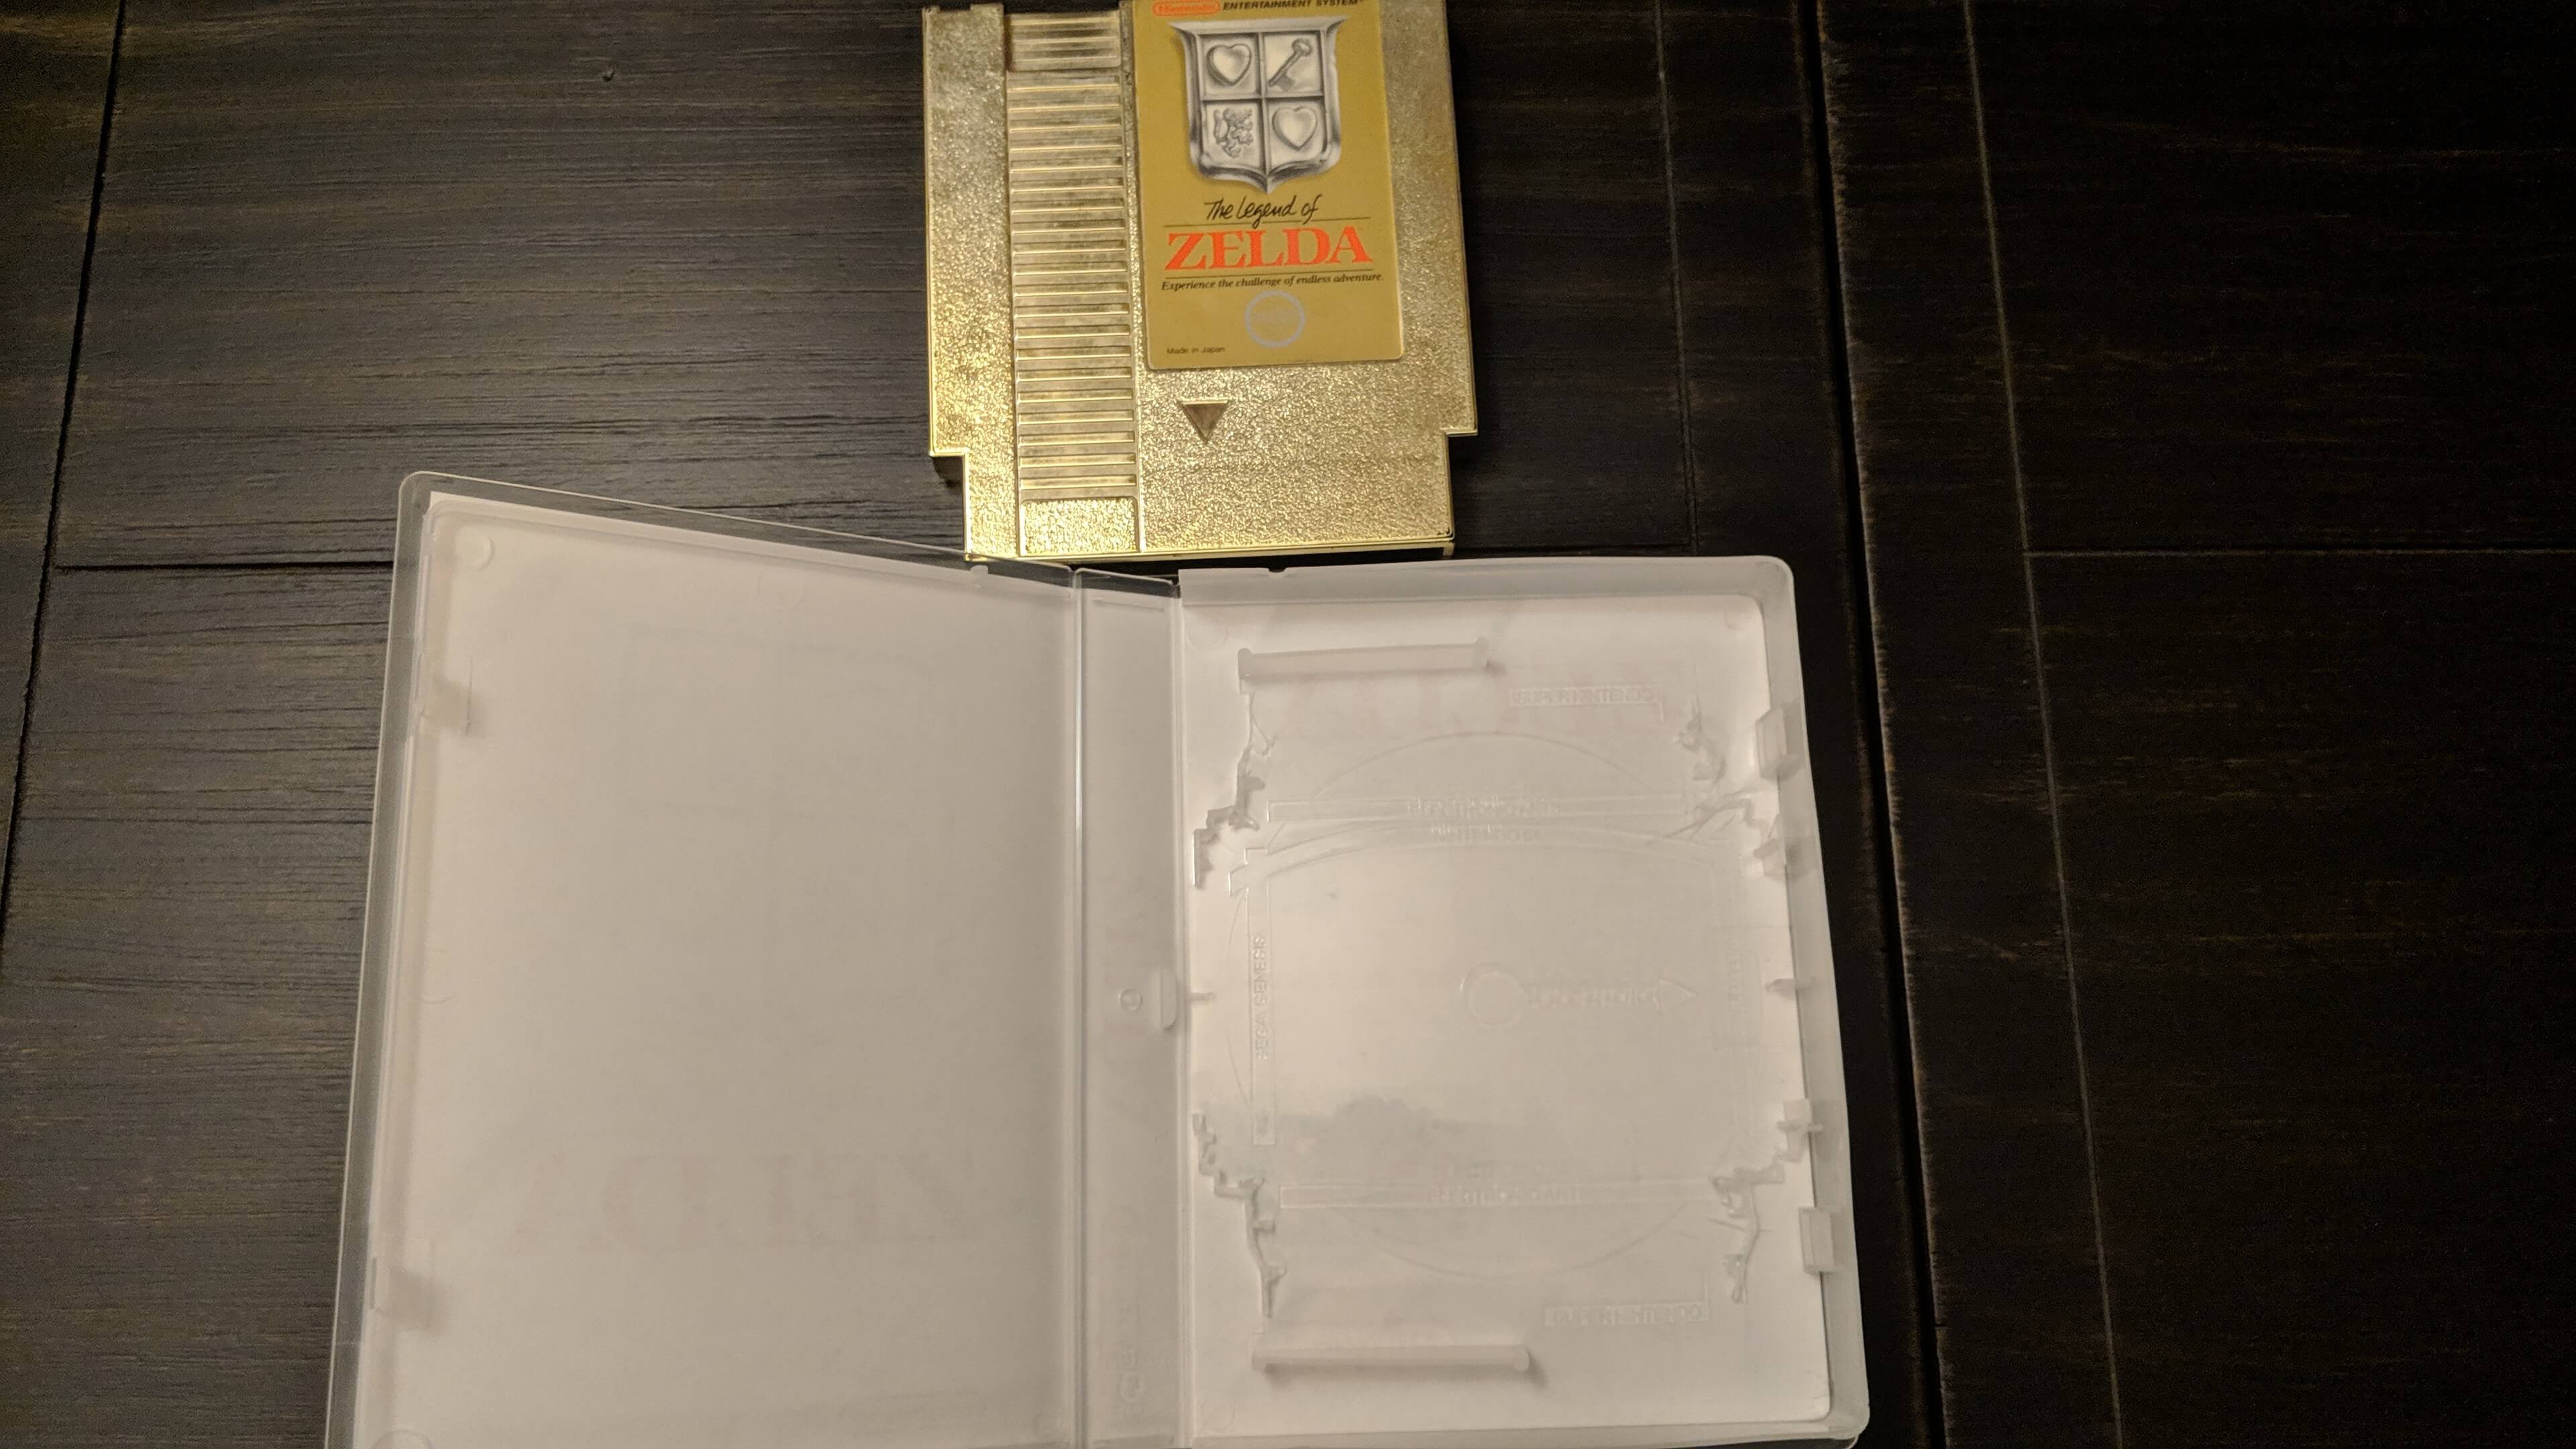
These cases aren’t without their drawbacks. First, and easily my most frustrating complaint, is that NES cartridges do not fit without modification! When I inspected the inside of one of these cases, I quickly understood why. Basically, if the plastic pieces inside are spaced out far enough to handle NES games, then games from the other consoles would just be floating inside with no kind of restraint. I learned from a YouTube video on how to easily modify these cases to allow NES games to fit using nothing more than pliers and wire cutters. Essentially, you cut out most of the plastic supports inside of the case. I don’t like that I have to do this every time I acquire a new NES game, but at least there is a solution.
Second, none of the games fit snugly and can move around when handled. This really isn’t a big deal and, again, it is a product of how these have to be designed for these things to be so “universal”. I can definitely see how a game might get scratches from sliding around a little while in one of these cases. Fortunately, I don’t really handle any of my games unless it is to remove them from the case so I can play them which limits my chances of causing any damage. I feel like the protection provided by these cases from dust, moisture, and other foreign particles far outweigh the possibility of the cartridge gaining any superficial scratches.
Other, More “Specialized” Cases
Have something other than an old cartridge game you want to protect? No worries! There are several other game cases out there for games from a lot of the other consoles and they all provide about the same level of protection for your cherished games.

Another case type that has versatility is the replacement Nintendo DS cases. There are two slots inside of these cases: one for DS and 3DS games, and one for Game Boy Advance games. Unlike the universal game cases, games fit snugly and securely inside replicating the feel of the official cases.

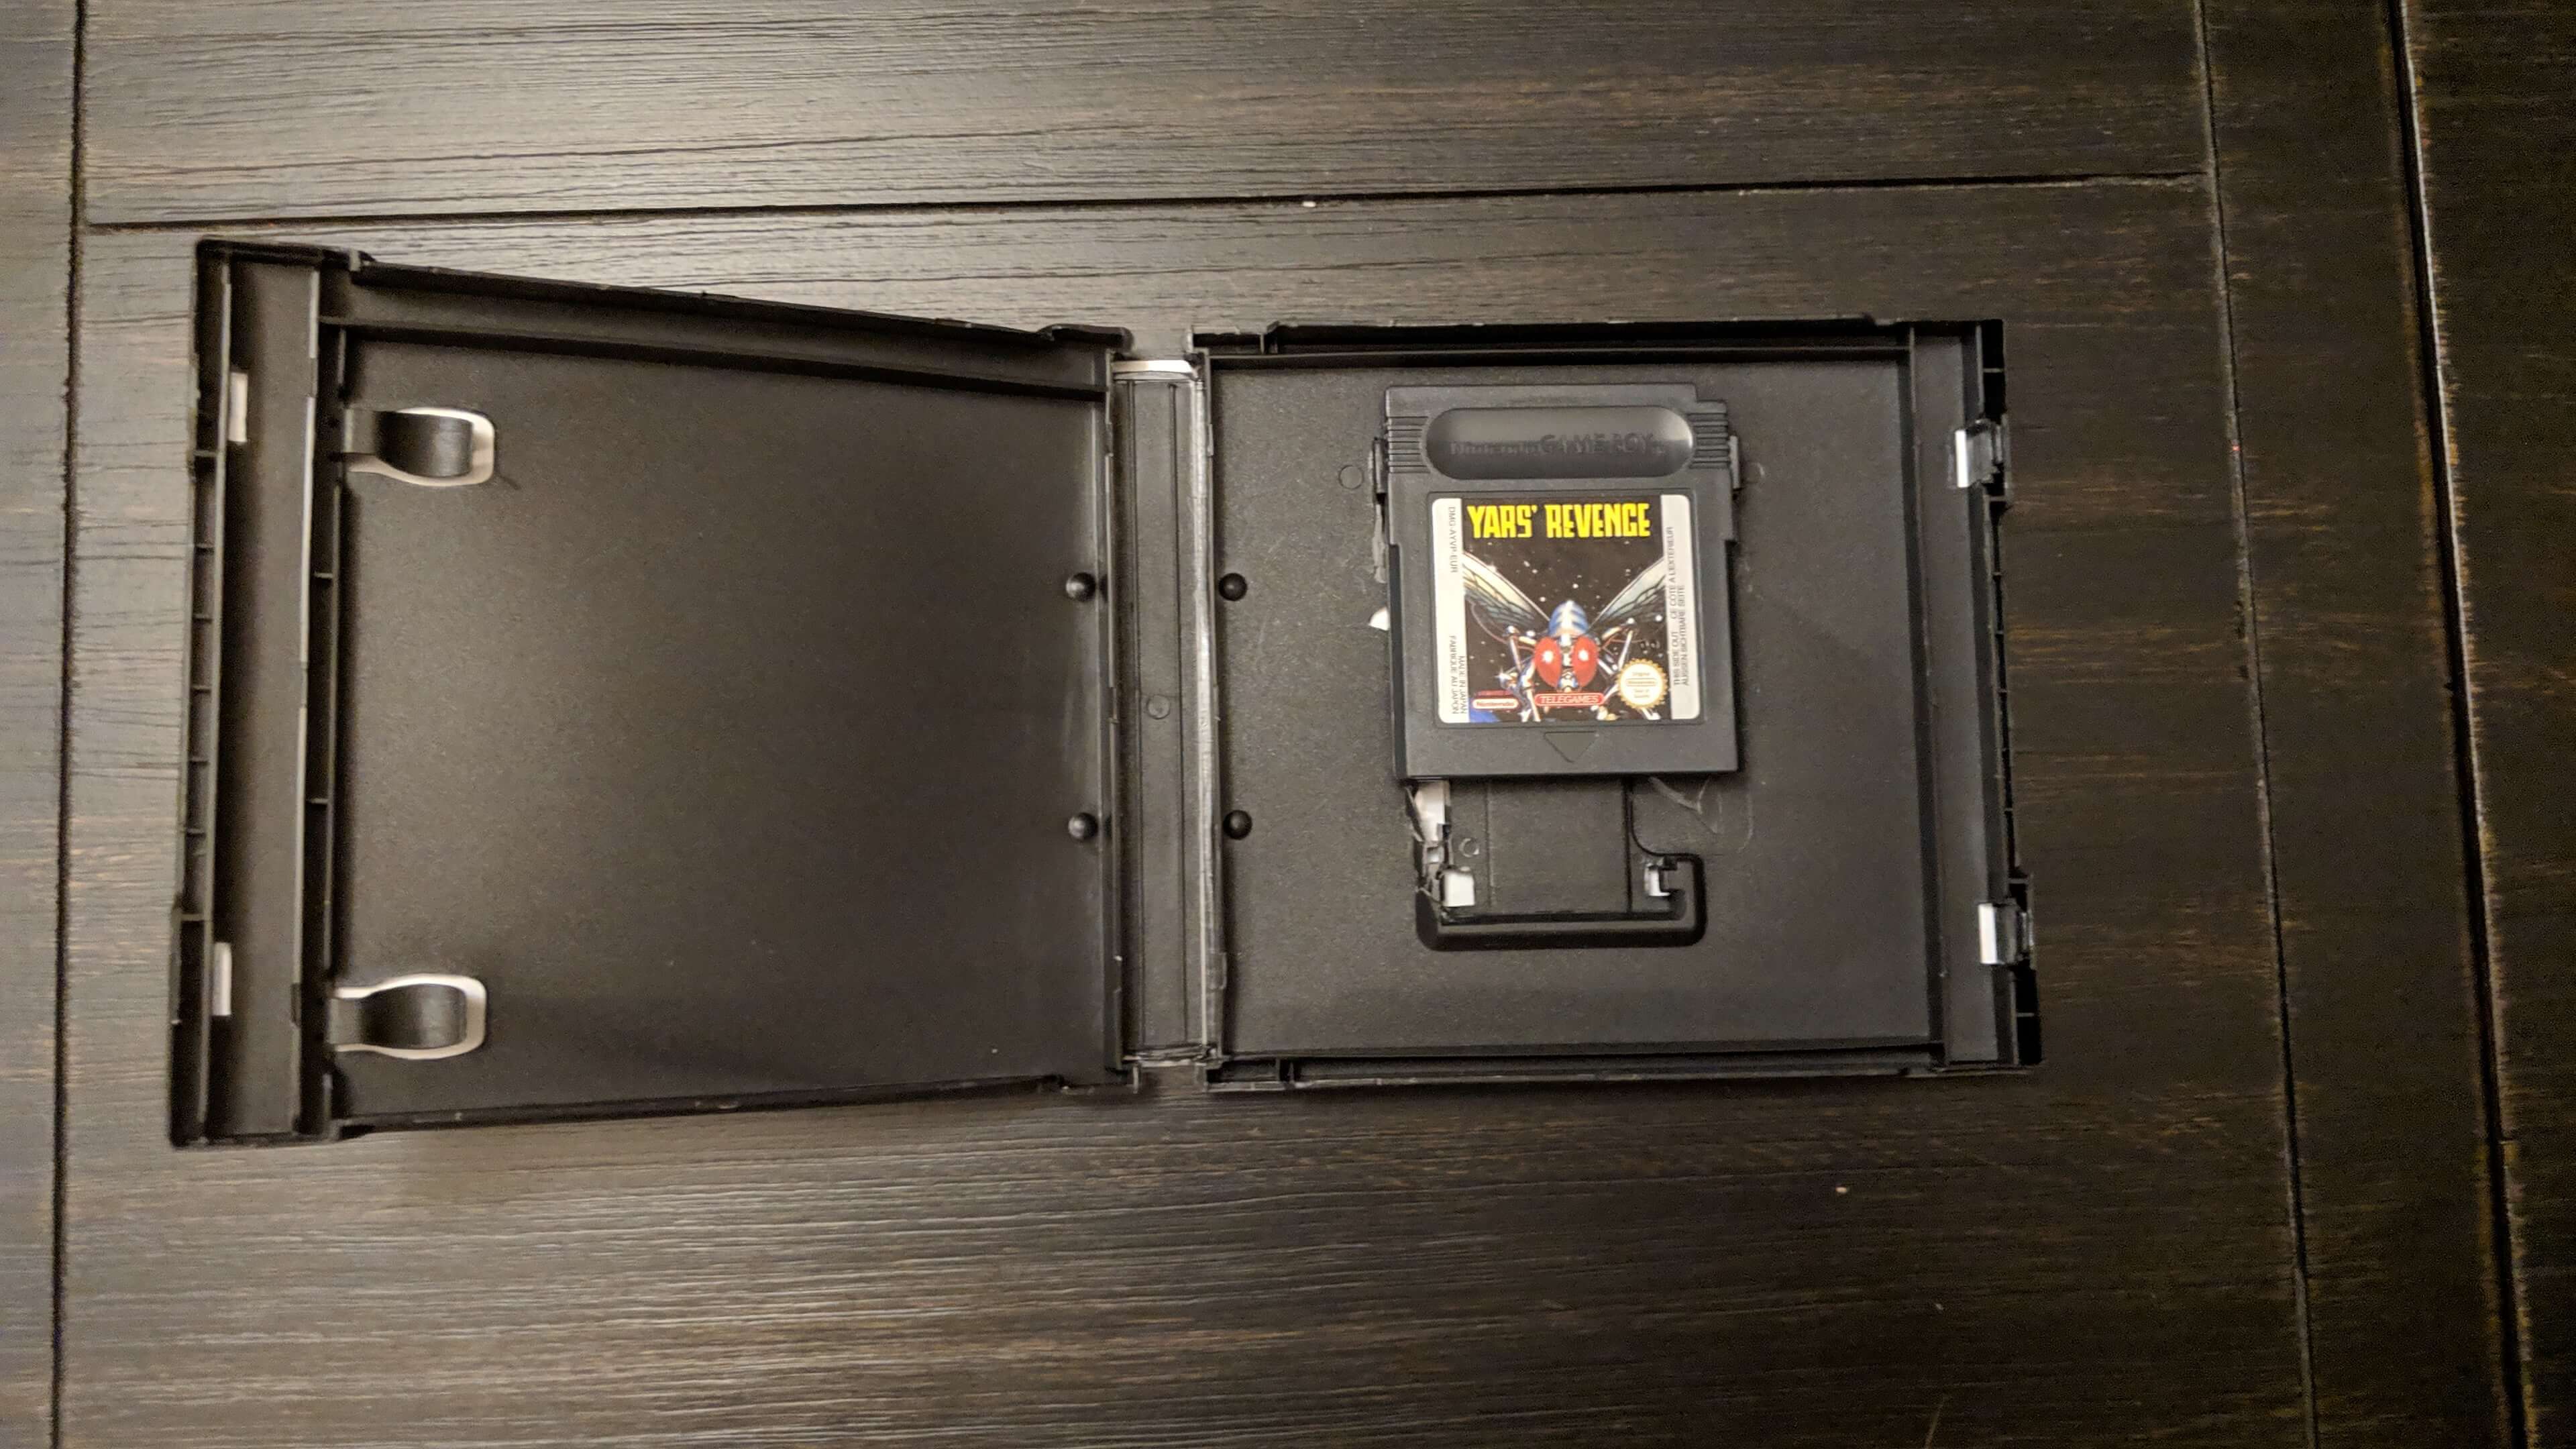
Not unlike the universal game cases, these can be modified to hold different game types. By cutting out some small, plastic pieces you can also fit your Game Boy Color and Game Boy games in these. The fit isn’t as secure as you might like, but again this is a situation where something is probably better than nothing at all. To learn exactly how to modify these you can check out YouTube.

Most recently, I bought several UMD cases to protect some loose PSP games I acquired. These also have a nice, tight fit and do a good job of replicating the look of the official cases aside from being clear. There are options out there that are smaller and less expensive, but I feel like the full-size cases look better on a shelf and allow for better organization.
Disc Based Cases
Disc-based games have the benefit of having more standardized cases. For my Wii, Wii U, Xbox, Xbox 360, GameCube, PS2, and Saturn games I use regular old DVD cases like these: Maxtek Standard 14mm Black Single Disc DVD Cases with Outer Clear Sleeve (25 Pack) . I know you can buy tall box cases for the Saturn, but I have yet to go down this path because they are a little harder to find and a bit pricier. DVD cases do a fine job of securely holding those discs and keeping them protected from scratching.
CD jewel cases also work great for some of these disc-based games as well and you can find them easily and cheaply. I go back and forth between CD cases and DVD cases for the Dreamcast, but my motivation there lies with the availability of what size covers I can find for the game for which I am putting into the case.
Print Some Covers for Those Cases
All right, so now you have all of your loose games placed into cases to provide protection. They might look nice and tidy on your shelves, but what if I told you that you can take things to the next level by printing cover inserts? There is a fantastic, community-driven site called The Cover Project where you can find printable covers for tons of old games that fit inside the various case types. Simply use the search bar at the top of the page or navigate by console name and by the first letter of a game title. Once you find the covers for your game, you usually have several options for covers of that fit different case sizes and that resemble cases from different countries. Just make sure you make the best selection to suit your needs. The Cover Project also has an active forum where you can find tons of good information and ask questions. This site is fantastic for collectors who want their collection to look as nice as possible!
On the rare occasion, I get a new game for which I cannot find a cover on The Cover Project. You can just make your own cover in a couple of simple steps though. I usually start by downloading a cover from The Cover Project that is the size of the case I will be using. This gives me a good template to start with since these covers are usually the perfect size and proportions. Then I use Google to find any box art I can. You can usually think of a cover as three separate things: a front, a spine, and a back. If you can at least find images for these 3 sections, then you can usually cobble something decent together. I open my template image in GIMP or Photoshop then, one piece at a time, move the individual images to their rough position over the template. From here I scale them to fit the area of the template they are supposed to cover and fine-tune the positioning. Before I know it, I’m looking at an acceptable cover for my game case. If the images are from different sources, then the colors might not match up too well. A few tweaks to the colors of the layer images and my creation is complete. This process takes some familiarity with photo editing techniques, but maybe I’ll go over some basics in a future post.
Printing the covers is a simple task. I load my printer with legal paper and set the size to 100%. Once the cover is printed, I use my trusty paper cutter to remove the excess paper and slide the cover into the sleeve of the case. Done and done!

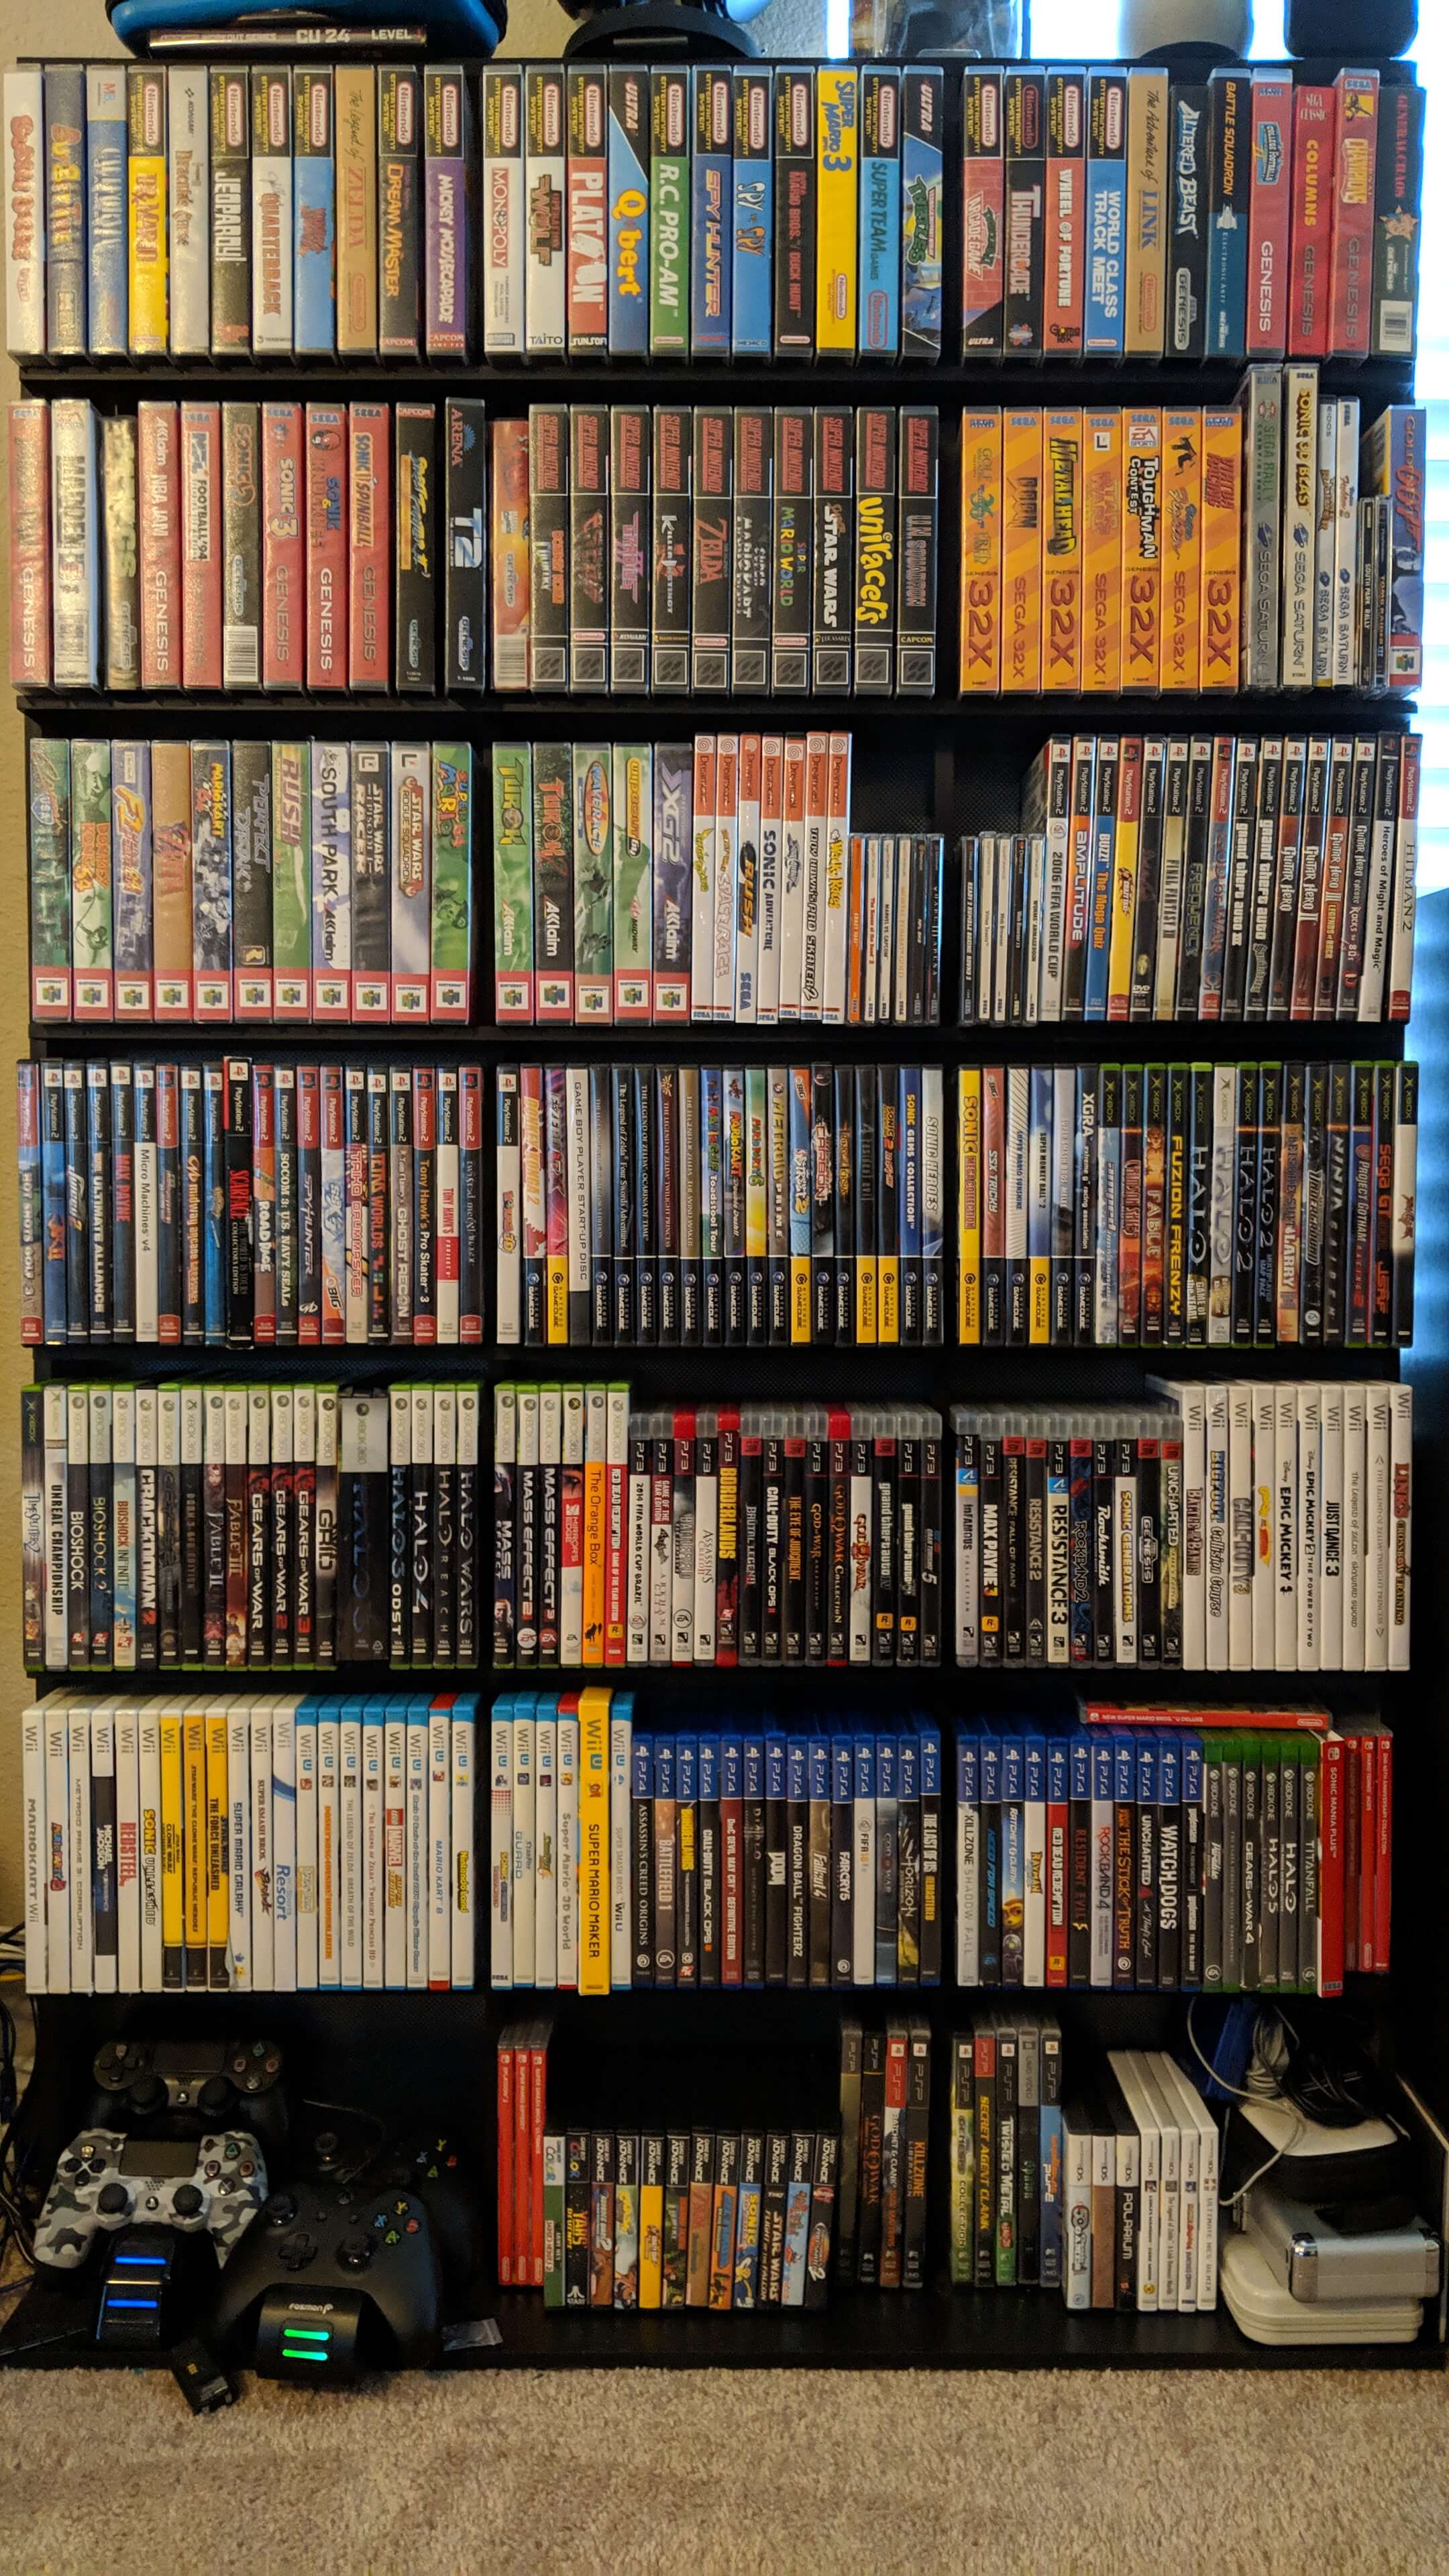
Well, there you have it. Now you know the tricks to protecting all of your old games while improving the look of your collection at the same time. It took me a while, but now I don’t have a single loose game on my shelves. I typically try to keep extra game cases on hand too. When I come home with a new game, I usually clean it, find and print the cover, place it into a case with said cover, and find a home on my game shelves for it before I even sit down. It takes a little time and money, but knowing your collection is protected and seeing the result makes it all worth the effort!
 Joey Gauthier 03/13/2019