 Joey Gauthier 03/02/2019
A Gamer and a Collector
Collecting video games, old and new, is a passion of mine. Aside from just collecting game, I’ve also been playing video games for about 32 years and I don’t plan on stopping! Considering that modern televisions usually only come with a few HDMI inputs and nothing else, connecting a bunch of consoles (especially the old ones) can prove to be challenging. Here’s an overview of how I did this on a budget and what I plan on doing to continue to improve my setup.
Cheap Upscalers are Good for a Start

Back in the days of old, those of us in North America connected things to our televisions using the old composite/RCA cables. If you go far enough back in time, you would find yourself connecting something to a TV using a coaxial cable or even one of those old balun connectors that required you to use a screwdriver to make sure the connection stayed in place. There was a brief period where console manufacturers were releasing S-Video cables, but I’m not sure if very many people were using them. Component cables came around a little later, but even now you would be hard pressed to find a new TV with component connections. So how do you hook up your old consoles to modern TVs? One word: upscalers.
Upscalers come in many forms for many different types of connections and the range in price point is drastic. For the beginning collector or even the budget-minded enthusiast, there are many options out there though. The easiest way to get your old NES or Genesis connected to your TV for the least amount of money involves purchasing a composite to HDMI upscaler from a retailer like Amazon. You can usually find them for around $35-$40 and they really couldn’t be easier to connect. Now I’m not going to lie, they are cheaply made (usually in China), they don’t do the best job in the world of upscaling the picture, they add a little bit of input lag, and they usually stretch the picture to fill the whole screen instead of maintaining the original aspect ratio. Still, if you’re on a budget or in a hurry, this is the simplest route to go and the result is “good enough”. Just read the reviews to make sure you’re not getting a product that is total garbage. Here’s a link to one that I’ve had success with: Tendak 3RCA AV CVBS Composite & S-Video R/L Audio to HDMI Converter Adapter
So What is an Upscaler?
Upscalers do 2 things: they enlarge the video signal to the desired size and they allow you to convert a connection type to another type. Old consoles like the NES and Sega Genesis output in 240p meaning that the picture is 240 pixels tall and drawn on your screen progressively. Later consoles like the GameCube were still only 480i. If you have a regular HD TV, then it can handle 1080p or 1080 pixels high. There’s a bit of a gap there, and an upscaler uses various methods to fill that gap. Usually, it doubles, triples, or quadruples the amount of pixels being drawn. This is necessary because TV manufacturers don’t care about how a new TV handles a signal from an older device like your NES so they don’t add quality upscaling to their TV sets. This results in very poor picture quality and, sometimes, it can even mean you won’t see a picture at all.
Now that you know that you need an upscaler to connect your old consoles to your new TV and have a basic understanding of what they do, it is worth knowing that there are high-end upscalers out there that will give you mind-boggling results. Be prepared to shell out some cash for them though! Usually, these upscalers come loaded with several connection types and software options allowing you to customize your experience to suit your needs and they don’t introduce any input lag.
Easily the most coveted upscaler out there is the Micomsoft Framemeister. Not only will this thing allow you to connect to it with several connection types, but it also has a wireless remote that allows you to set various options including filters that can sharpen or smooth out your picture. You won’t find these in stores, but you can commonly find them on eBay if you want to get the best instead of messing with the rest. Just be prepared to shell out between $400-$450 or more (at least at the time of this writing).
Thankfully, there have been other high-end alternatives coming to the market over recent years. The most recent one that has gotten my attention is the RetroTINK. For about $100 you get a small little powerhouse that can accept your s-video, component, and composite connections and do a superb job of converting them to 480p picture through an HDMI cable. Now obviously 480p still isn’t HD, but MOST modern TVs will do a nice job handling a signal at least that resolution. Likewise, for about double the price, you can look for an OSSC which can get you up to 720p output sometimes and has a slew of options for your endless tinkering!
A Word About Cables
Can you grab the right upscaler, plug in the original cable from your console, plug the HDMI output into your TV, and go to town on some retro games? Sure, but if you’re anything like me, you’ll want the best picture possible and your original cables are not the best option. This is where things can get pretty deeply confusing, so I’ll just touch on the basics here.
As far as HDMI cables are concerned, buy the cheapest ones you can find! Those $100+ Monster cables are a complete rip off! Basically, if it is an analog cable then those pricey, super shielded cables with gold plated connectors are actually the best route to go. Analog signals pick up interference and can get weaker the farther they travel so quality cables are needed. HDMI cables pass a digital signal that is not prone to interference, therefore, those super fat, shielded cables you see at Best Buy are nothing more than a marketing scam that preys on the less informed. You are no longer in the “less informed” group!
All that said, your older consoles DO output an analog signal so quality cables are a must. What complicates things even more is that most older consoles can also output over different cable types than what most of us are used to using. For example, if you had a Sega Genesis as a kid and you lived in North America then you probably connected it to your television using the standard yellow composite cable. I have my Genesis connected to an upscaler using a European SCART cable and it required no modification. So what does that matter? Well, the old composite cable is really the worst option out there because it passes all color and brightness data over 1 connection allowing the signal to more or less interfere with itself. This results in a fuzzy picture with terrible colors. Did you ever wonder why the sky in Super Mario Bros was purple? It isn’t! Your crappy composite cable output it that way. It really is blue if you output RGB. Different consoles have different cable types they can use in their stock, non-modded form. If you want to get the best cable possible for your console, just Google something like “best cable for connecting a <-your console here->“ or “does a <-your console here-> output RGB with SCART”. Basically, I try to get everything to output through RGB via SCART or component if possible, but some consoles like the NES or N64 won’t do this without modification so research is key here.
Modified Consoles
If you’re into retro gaming and have never explored the world of modified consoles, you do not understand what you are missing! The purist in me appreciates an old game console in its original state and, if I buy a modified console, I make sure I always have an unmodified version of that console first for the sake of collecting. You can get a modified NES that outputs RGB resulting in an amazing upscaled picture. I even have a modified N64 from Japan that not only plays US and Japanese games, but it also outputs pure RGB and has the “de-blur” mod which sharpens the pixels even more! You can find some insane modifications to most of the older consoles if you look around, especially on eBay. Just beware, there are sellers out there that do some poor quality work. Check seller ratings and do your homework before buying a hardware modified console. I even recommend checking out folks like Voultar who do outstanding work and can either mod your console for you or sell you one that is already modded. If you have pretty solid soldering skills, then you can buy mod-kits and do the modifications yourself which will save a load of cash!
Switchers

As your collection grows, you might find that you have over 1 console with a certain connection type and most upscalers only accept 1 connection. What to do? Well, there is also a world of switchers out there. Just like with the upscalers, you will find that switchers range in price and performance, although the difference isn’t as big a deal as it is with the upscalers. Currently, I have switchers for SCART, component, s-video, and even composite connections. This allows me to connect multiple consoles to the switcher, then connect that to the upscaler. Buying the pricier switchers can result in a SLIGHTLY better picture as the switcher itself won’t negatively affect the signal. Still, the cheap ones do the job in a pinch.
What Do I Do With All These HDMI Cables?
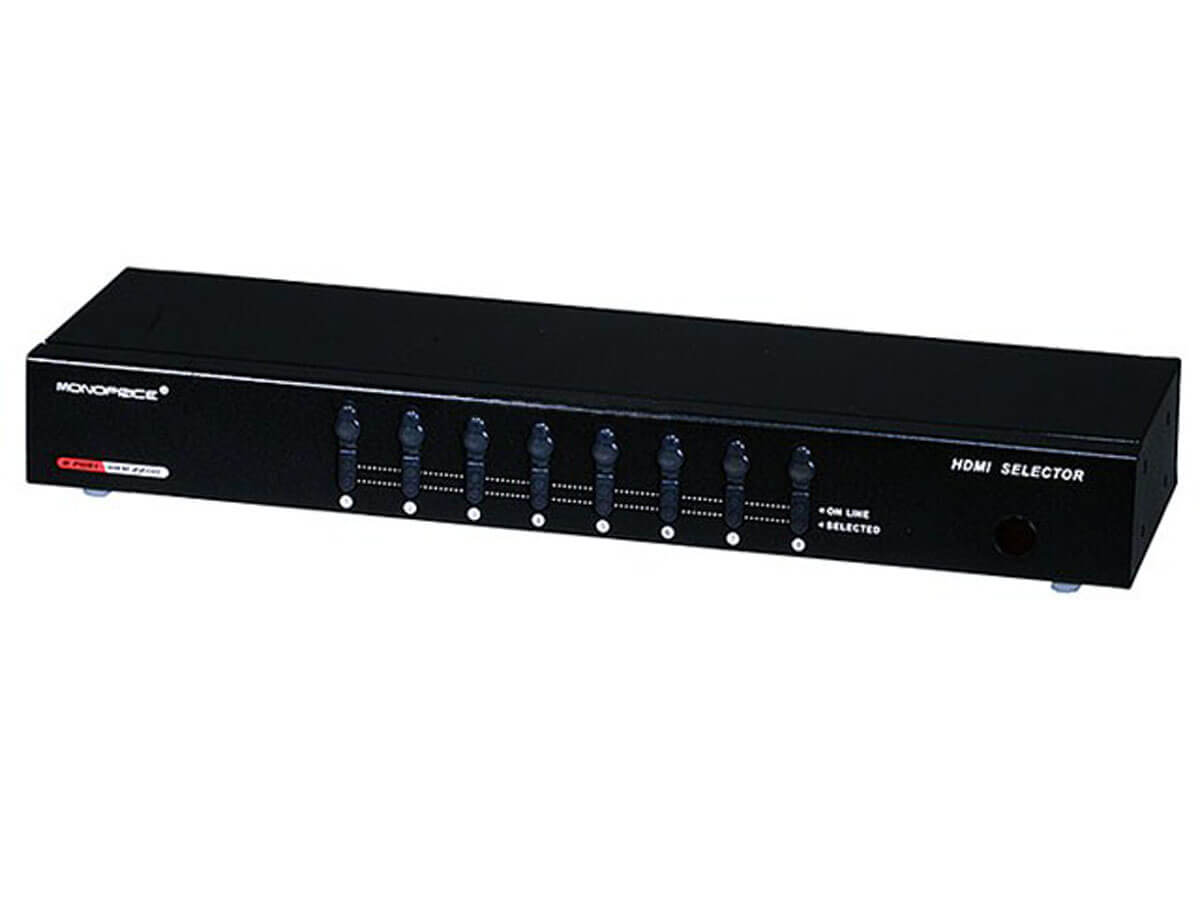
So you’ve acquired a few consoles, purchased the desired cables for the job, connected everything to the required switcher, got upscalers to turn everything into HDMI, and now the number of HDMI connections on your TV falls WAY short for what you need. Not a problem! They make switchers for those as well and they are cheap. Amazon is a good resource for buying these and there is no need to spend more money than you have to unless you want one with more ports. An example of this is where I recently spent $100 on a Monoprice 8-port HDMI switcher because I was tired of having so many 4-port switchers sitting on my TV stand. I bought that just to clean up the mess.
Another thing to keep in mind is that if you have a surround receiver, it is likely to have a handful of HDMI connections on the back. In my case, I used up the 3 on the back of my surround receiver and 4 on the back of my TV before I ever purchased an HDMI switcher. Use this approach to avoid spending more than you have to until you have to!
The Details
It goes without saying that you will have to power all of your consoles. Be prepared to sink money into buying power strips. I suggest you buy the ones with extra space between the outlets because most old consoles have those huge wall wart power connectors and half or more of the outlets on a normal power strip will go to waste because these wall warts will overlap 2 or 3 other outlets. Optionally, you can invest in a power conditioner which not only gives you many more outlets, but it also cleans the power signal and is better capable of handling surges. These can get expensive, but if you have more collectible/more expensive consoles, then they are worth the expense. I have one and it powers the best of my collection where all the others are plugged into regular power strips.
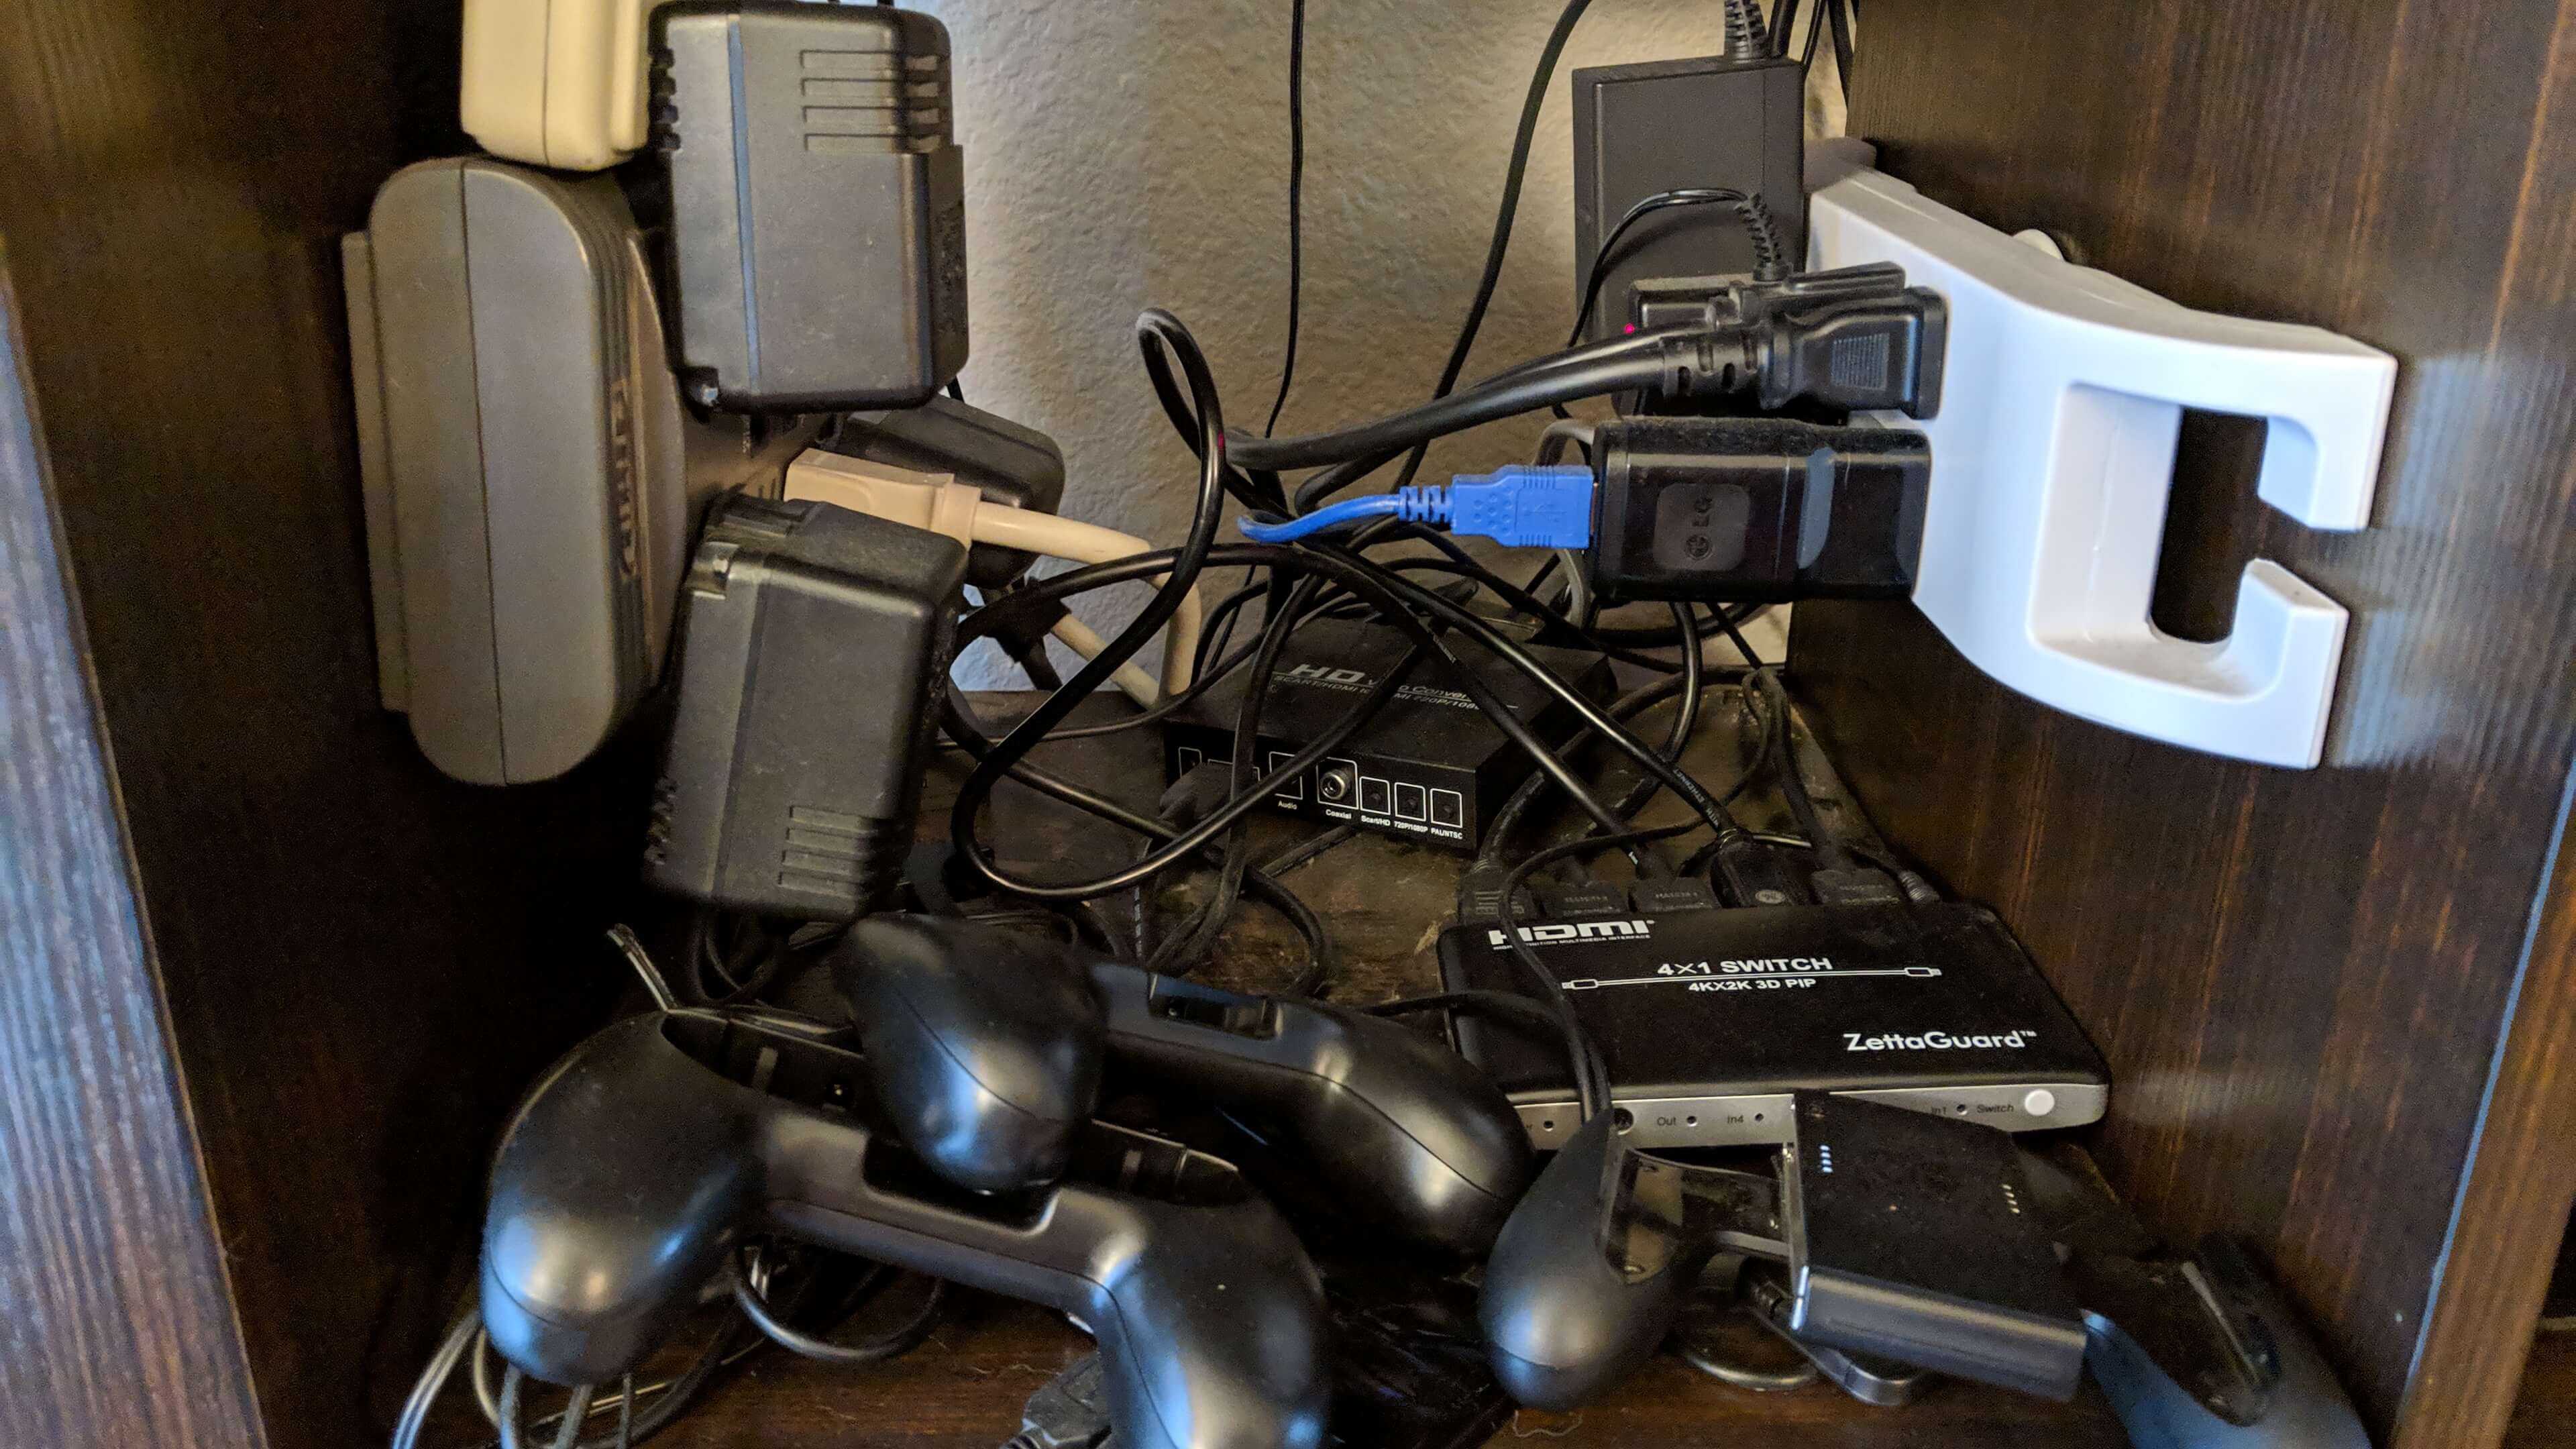
Aside from that, you’ll probably want some sort of cable management solution. I use velcro straps to bundle together large masses of cables, but admittedly I’m not the best person to tell you how to handle cable management as mine are a mess! There are other solutions out there and this is an area where you can get creative with your solution.
Hopefully, you now have a basic understanding of how to connect a bunch of old consoles to a modern television (or at least how I do it). Having a bunch of consoles connected at once can be rewarding and always sparks up a conversation with guests. It’s nice to be able to power on a switch and a console, drop in a game, and just start playing immediately. Don’t just collect em all, play em all too!